Comic Book Style in PaintShop Pro
View the youtube video here: Comic Book StyleThis tutorial is going to walk through the steps of creating the comic-book looking affect shown below. The main components of this effect are reducing the color depth and having reduced fine detail, but with still sharp edges.

Isolate the Subject First
As with many tutorials the first step is isolating the subject (in this case the basketball player) from the background. This can be done with a combination of the Background Eraser, or performing some tedious selection editing.
Image One - Reduce Color
A key component of this approach is to modify the Color Depth. This however modifies the entire image, so we'll need to do this on one copy of the image, then add it back into the original.
So the first step to reducing fidelity is to decrease the Color Depth of the image. This can be done with Image > Decrease Color Depth > X Colors. The settings I used for this example are below:

Now that we've reduced the fidelity, we want to bring the image back to a usable Color Depth. We can do this with Image > Increase Color Depth > RBG 8 bits/channel. This will have a somewhat of a smoothing effect. But we'll enhance that with a few more adjustments.
Image One - Smooth Out the Grain
To begin smoothing the reduced image more, we are going to Adjust > Add Remove Noise > Edge Preserving Smooth. For this size image, I'm maxing out (30) the amount of smoothing.We then chase this with even stronger smoothing by using Adjust > Add Remove Noise > Median Filter. This has a much greater effect, so I used a Filter Aperture of 7. The goal for using these tools is to smooth out any noisy or spotty areas. To get the comic look we want clearly defined splotches of color with hard edges.
We have now completed Image One. We'll need to remove the background again, but this can be done simply with the Magic Wand to create a selection, then delete it.

Now we'll want to copy this image onto the original (which should be the image of the basketball player separated from the background). When copying Image One over, you may have to manually align it to the original.
Adding Fine Shadow Detail
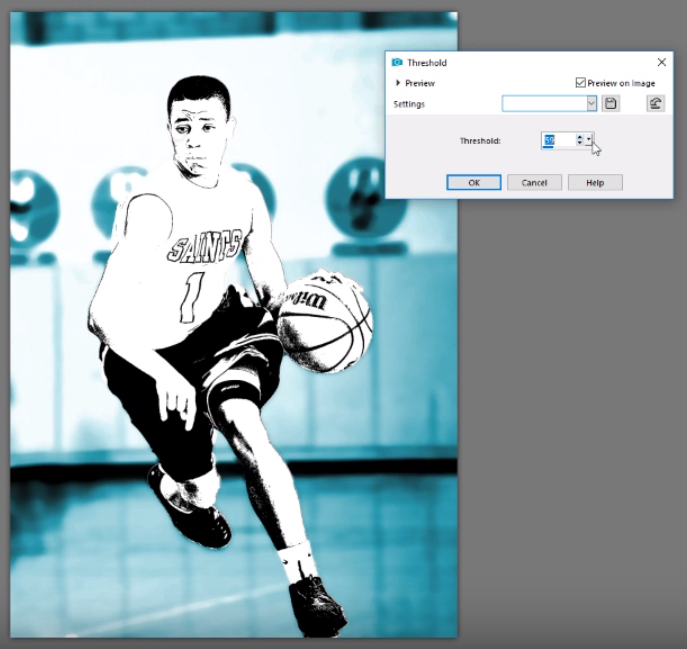
For this next stage we want to take the layer with the original basketball player (not the one from Image One), duplicate it, and move it to the top. For this layer apply the Adjust > Brightness Contrast > Threshold.Setting the value is an artistic judgement call. My intent was to find the balance of detail and creating harsh shadow lines where I wanted them. If you really want to polish this effect, you may need to isolate regions and use different threshold values. In the first pass I used a value of 49.
Finally change the blend layer to Multiply to blend the darkened shadows into the scene.

Now at this stage (if it wasn't obvious before), you'll notice that reducing the Color Depth changed the color of the subject. To get the color back to the original we need to select the Image One layer and change it's blending mode to Luminance (Legacy). This has the effect of retaining the luminance of the layer, but retaining the color of the layer beneath it.

Cleanup
The final step is to do some cleanup, and this is primarily focused on smoothing out any remaining noisy or spotty areas. For example, the leg shadows and the basketball still look a little gritty in the shadow, so we can use the Freehand selection tool, and apply Median Filter to taste.For the final version of this image, I added a few more passes with Threshold in selective areas (as described earlier). Another comic-book effect that is often used is the Effects > Artistic Effects > Halftone, but I actually like it better without it.

Comments
Post a Comment